Azure DevOps: Handling Source Control operations with Azure DevOps and Repos
July 15, 2023 Leave a comment
Azure DevOps provides a powerful set of features and tools for effective source control management through its Repos service. Here, we will explore the steps involved in creating a new Git repository in Azure DevOps and cloning a remote repository in Visual Studio Code.
Creating a New Git Repository in Azure Project:
To create a new Git repository in Azure DevOps, follow these steps:
Step 1: Access the Azure DevOps portal and navigate to your project.
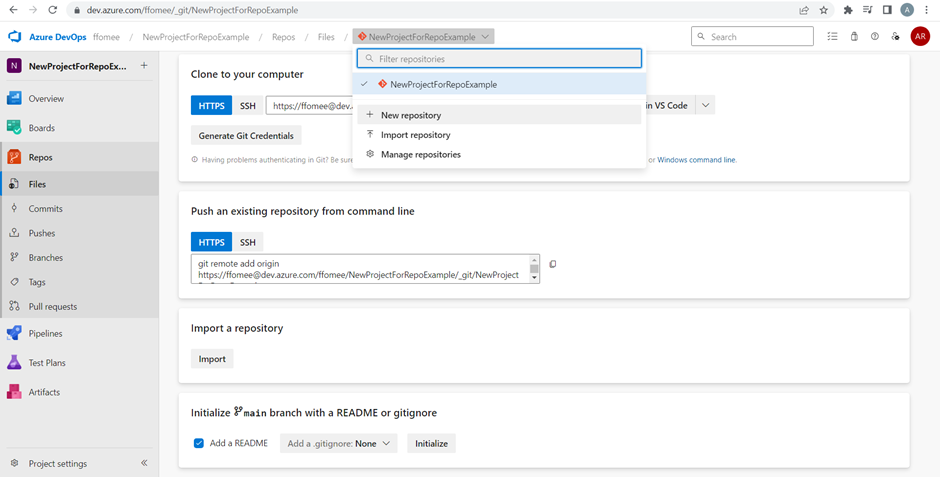
Step 2: Select the “Repos” section from the left-hand navigation pane.
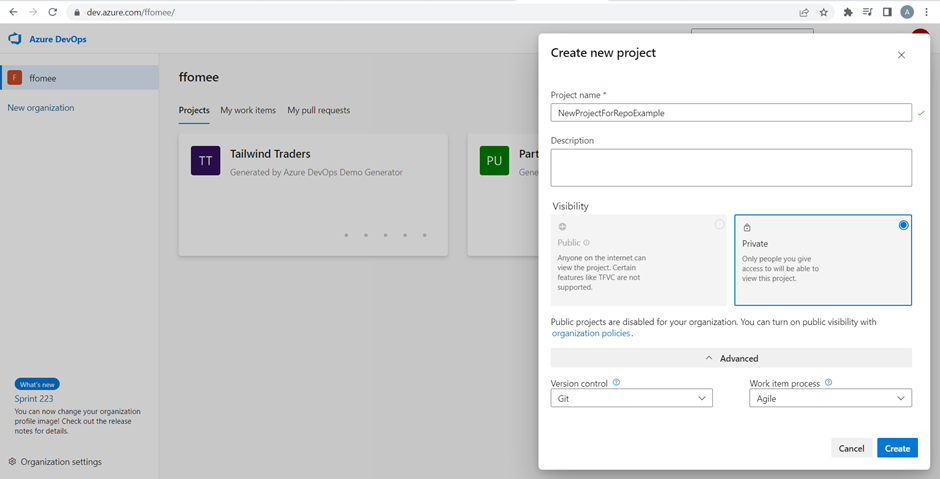
Step 3: Click on the “New Repository” button to create a new repository.
Step 4: Provide a name for the repository and choose the Git repository type.
Step 5: Optionally, initialize the repository with a README file or start with an empty repository.
By following these steps, you will have successfully created a new Git repository within your Azure project.
Cloning a Remote Repository in Visual Studio Code:
To clone a remote repository in Visual Studio Code, follow these steps:
Step 1: Install Git and Visual Studio Code on your machine if you haven’t already.
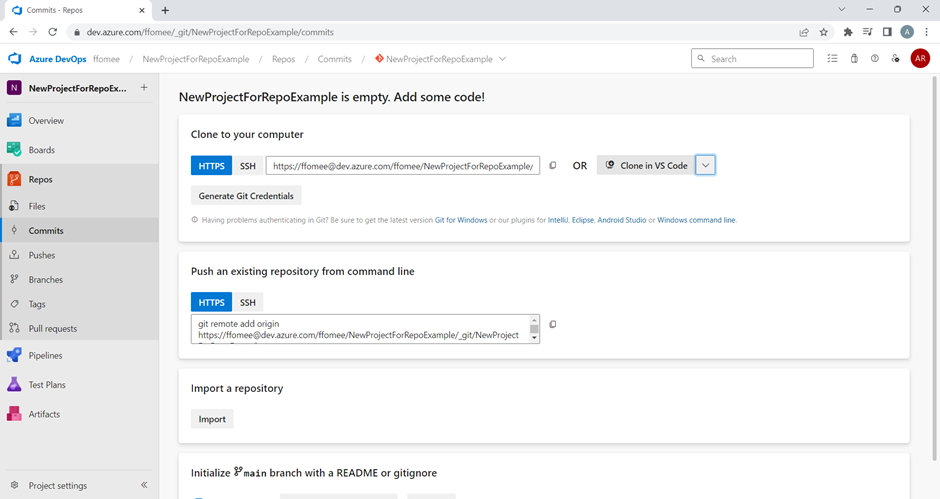
Step 2: Copy the clone URL of the remote repository from Azure DevOps. You can find this by navigating to the repository in Azure DevOps and clicking on the “Clone” button.
Step 3: Open Visual Studio Code and select “Clone Repository” from the welcome page or the “Source Control” view.
Step 4: Paste the clone URL into the input field and choose a local directory where you want to store the cloned repository. Step 5: Click “Clone” to initiate the cloning process.
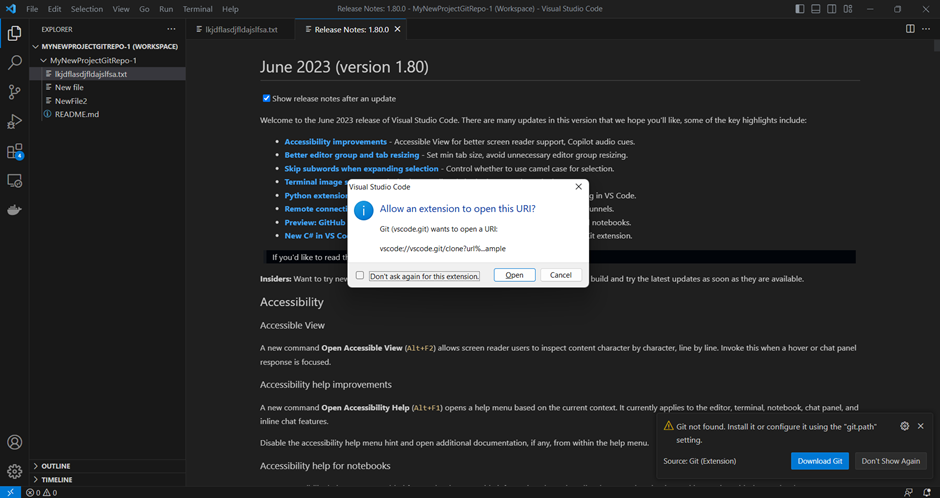
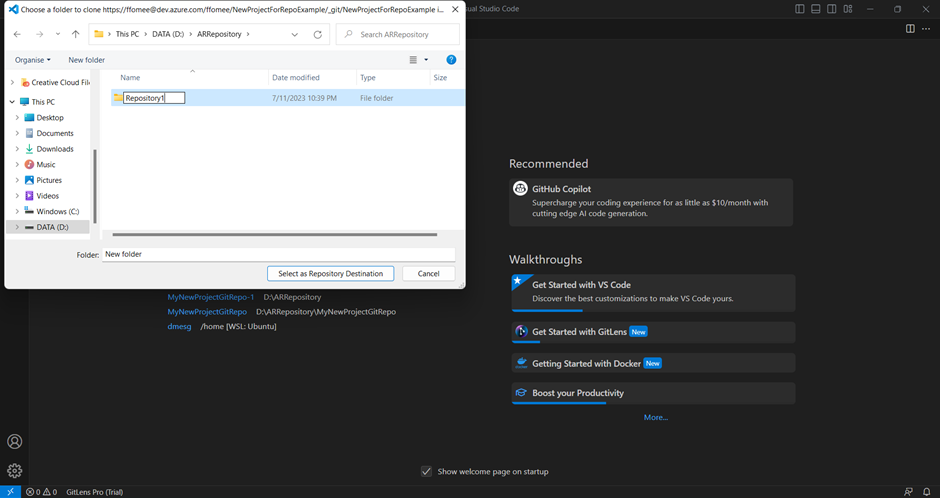
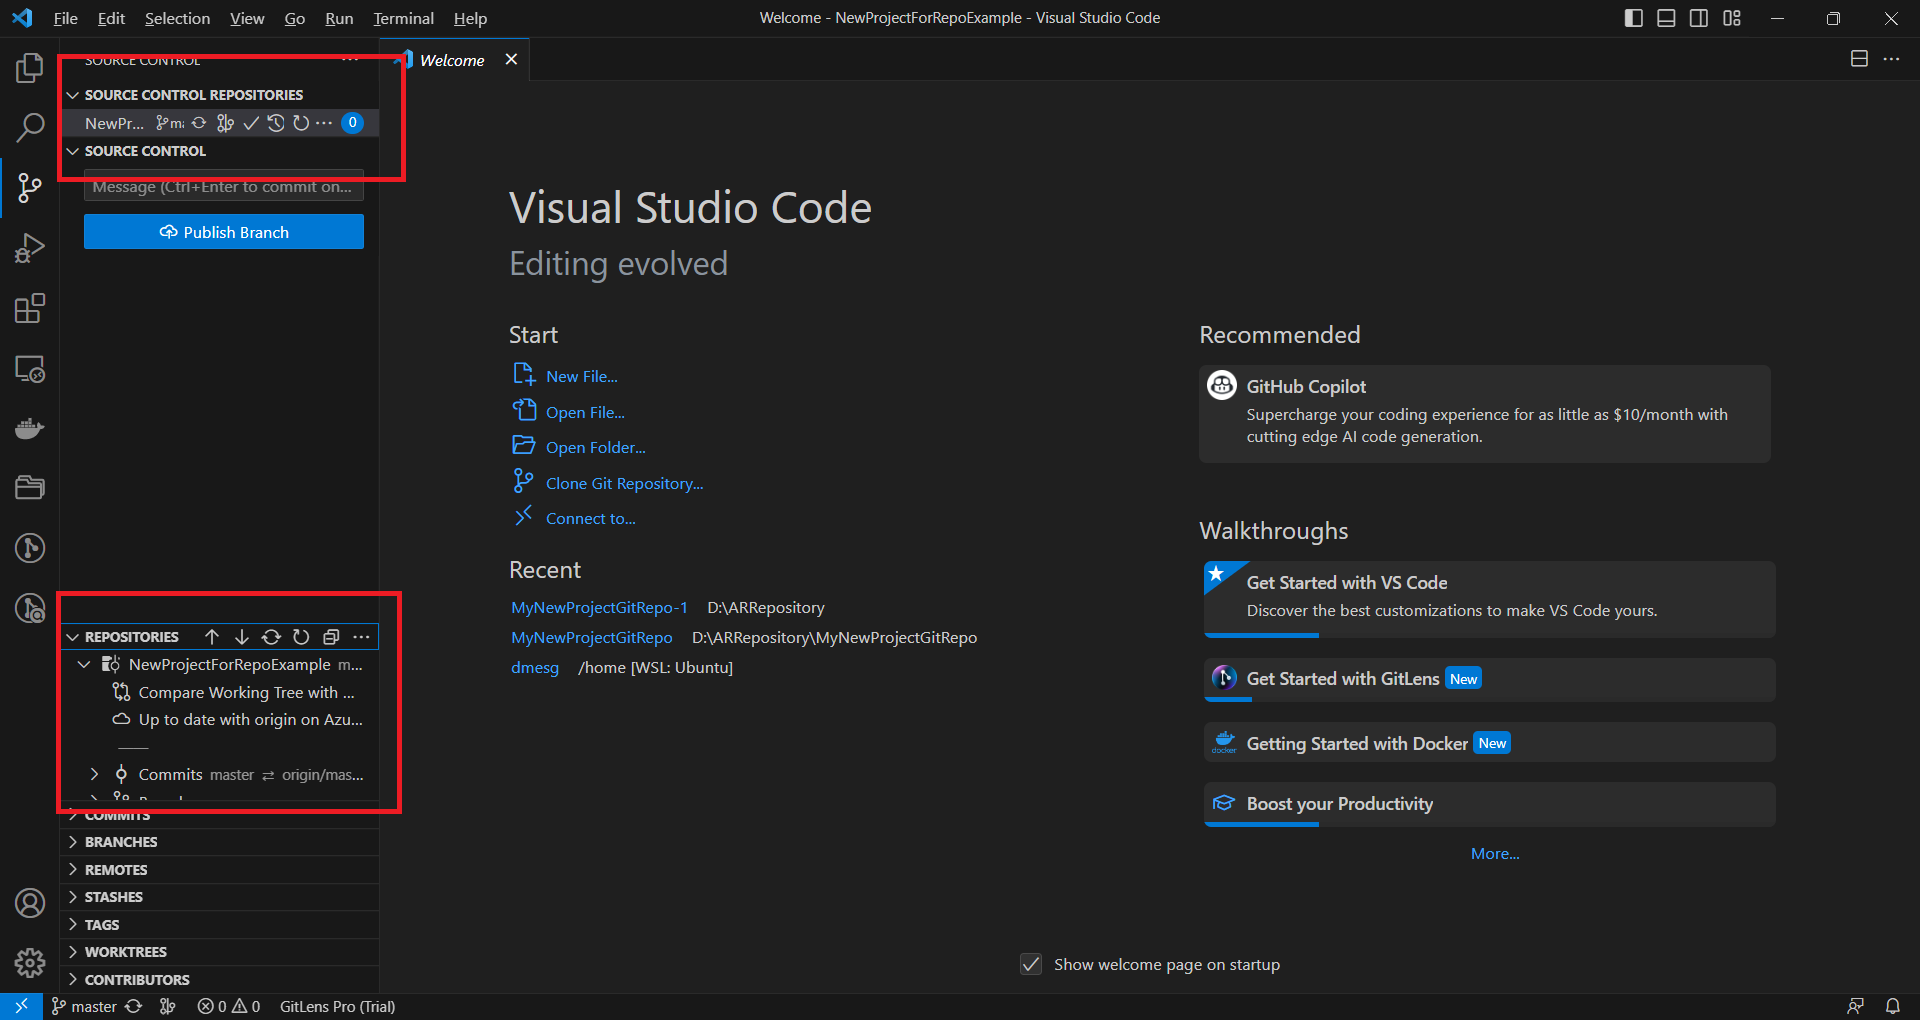
Visual Studio Code will then create a local copy of the remote repository on your machine, establishing a connection between the local and remote repositories.
How to Work with Commits, Pushes, and Branches using Visual Studio Code and Git Repository:
Now, let’s explore the steps involved in working with commits, pushes, and branches using Visual Studio Code and your Git repository.
Commits:
Step 1: Make changes to the files within your local repository according to your development requirements.
Step 2: Stage the changes you want to include in a commit. This can be done either by using the Git extension in Visual Studio Code or by running Git commands in the terminal.
Step 3: Provide a descriptive commit message that clearly explains the purpose of the changes.
Step 4: Commit the changes to your local repository by executing the commit command.
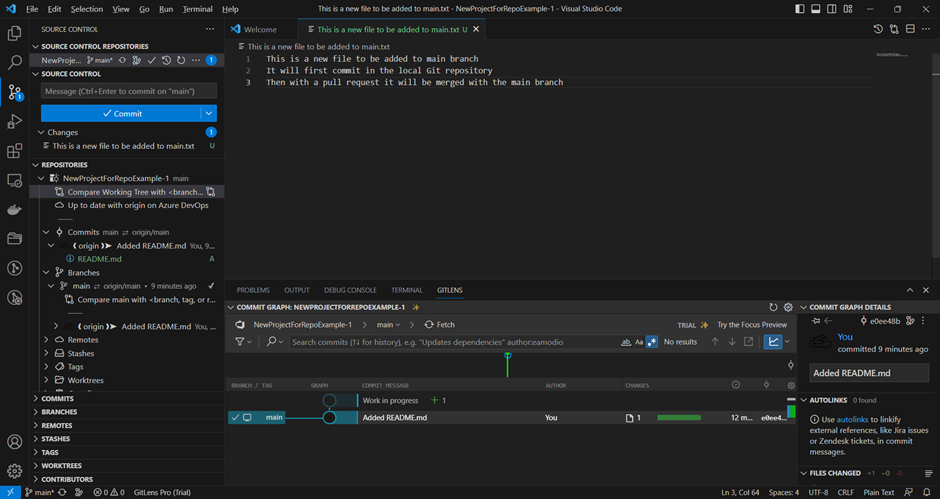
By following these steps, you will have successfully created a commit containing your changes within your local repository.
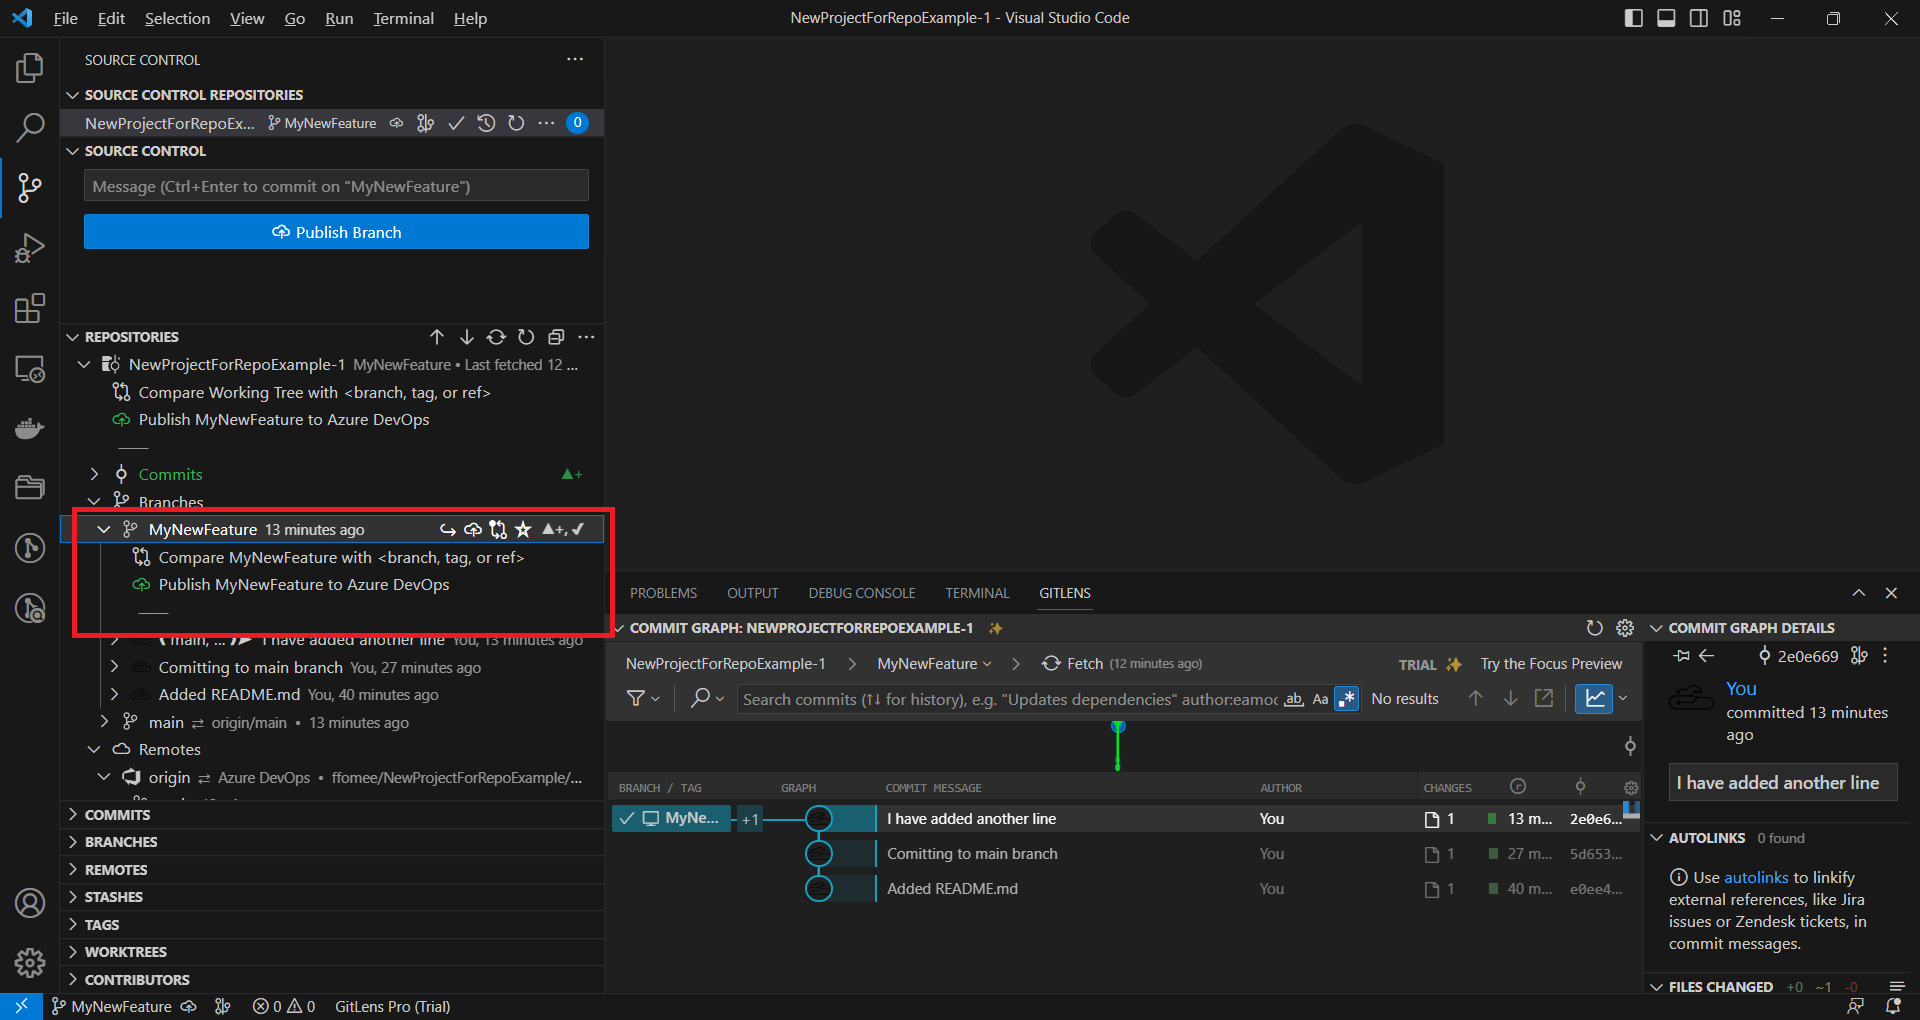
Creating a New Branch for a New Feature:
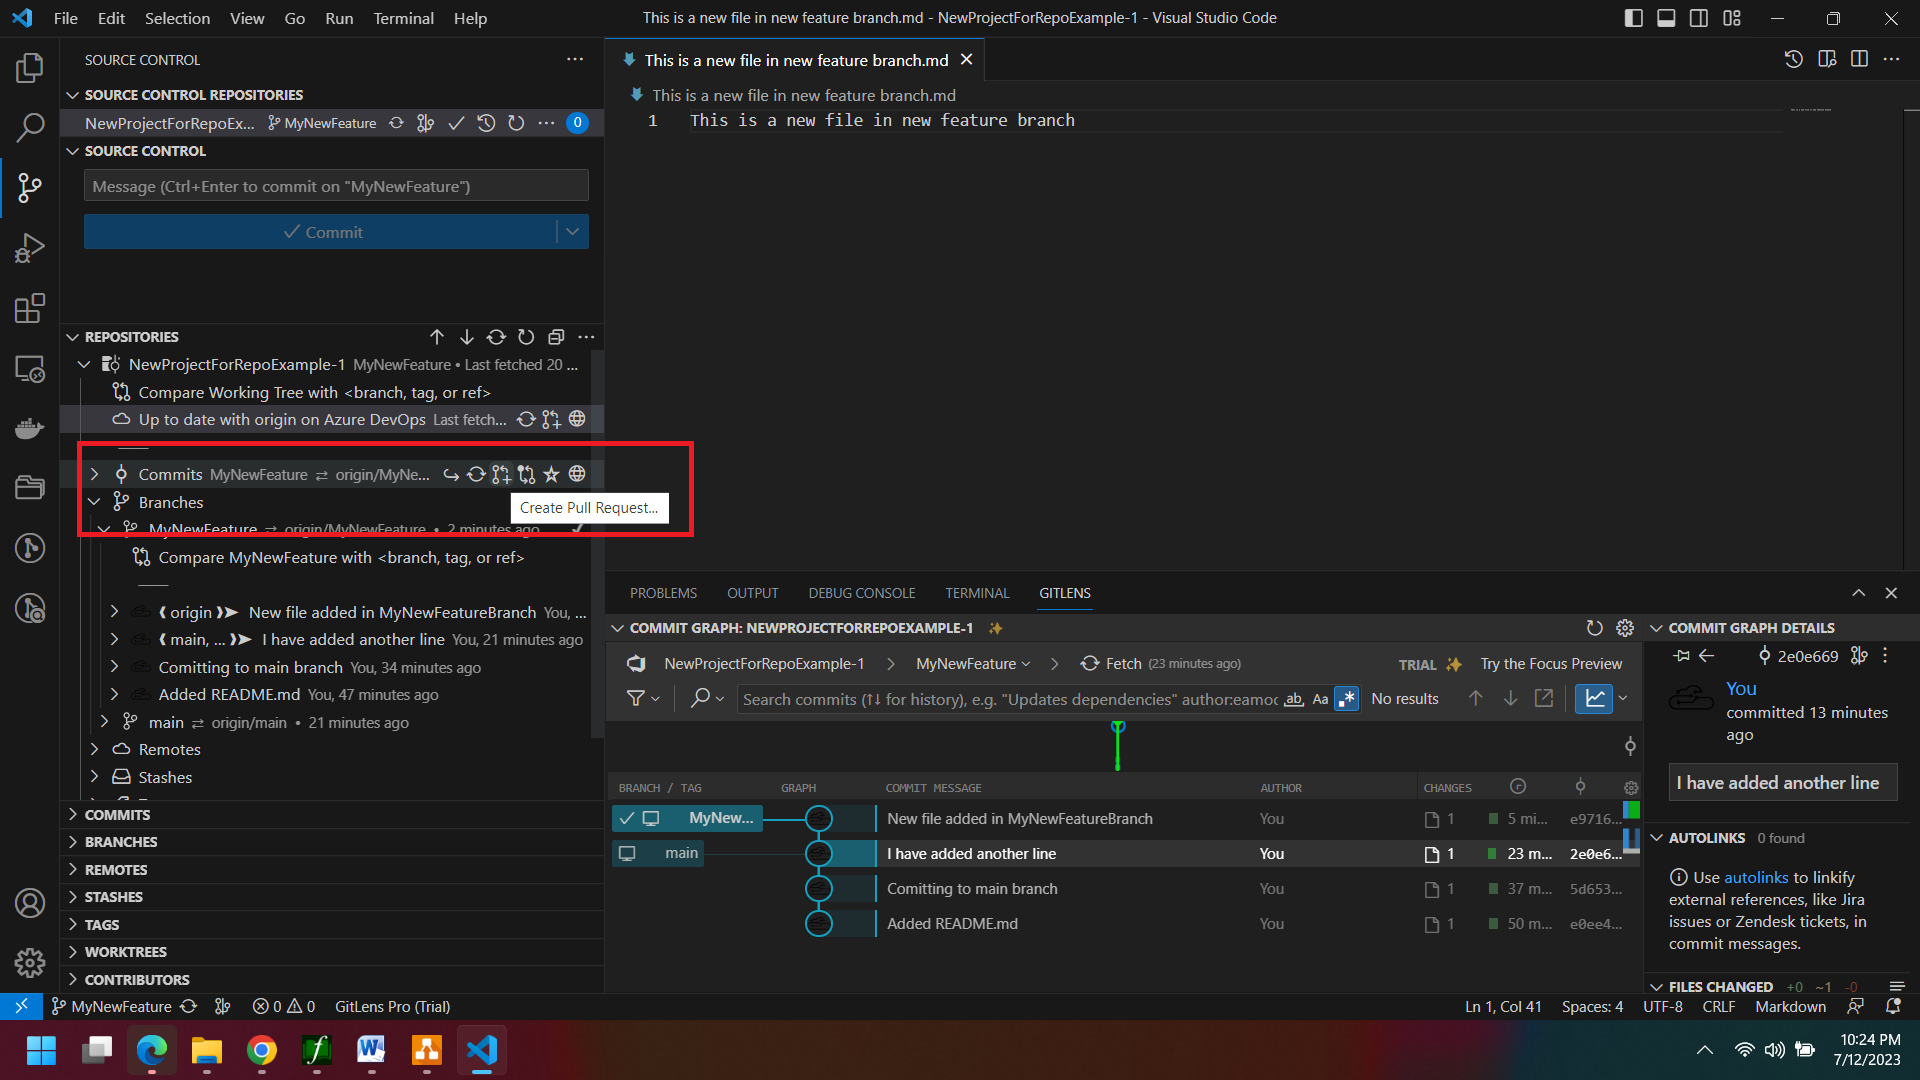
Step 1: Create a new branch for the feature you are working on. This can be done through the Git extension in Visual Studio Code or by executing Git commands in the terminal.
Step 2: Switch to the new branch in Visual Studio Code, ensuring that your changes will be isolated within this branch.
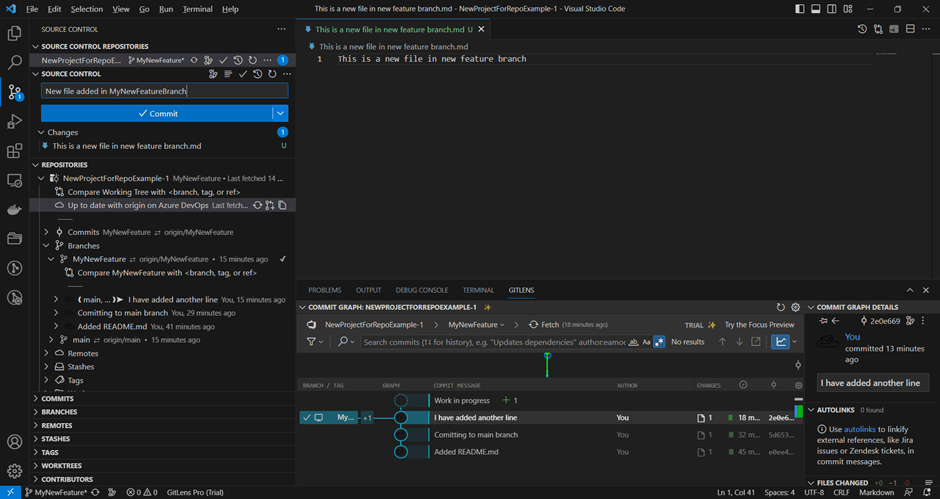
Adding Files in the New Feature Branch:
Step 1: Create or modify files related to the new feature you are working on within your local repository.
Step 2: Stage the changes to include them in the upcoming commit.
Step 3: Commit the changes to the feature branch within your local repository.
By following these steps, you will have added and committed the changes specific to the new feature branch.
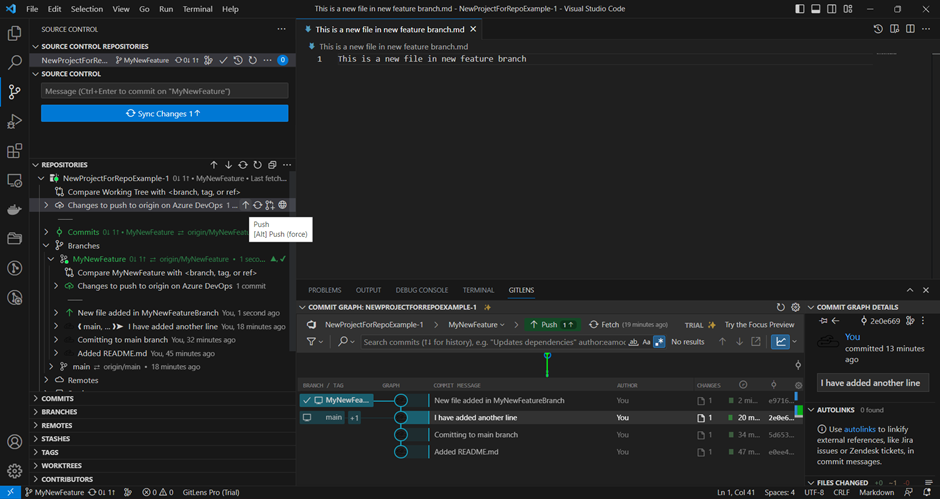
Pushing Changes:
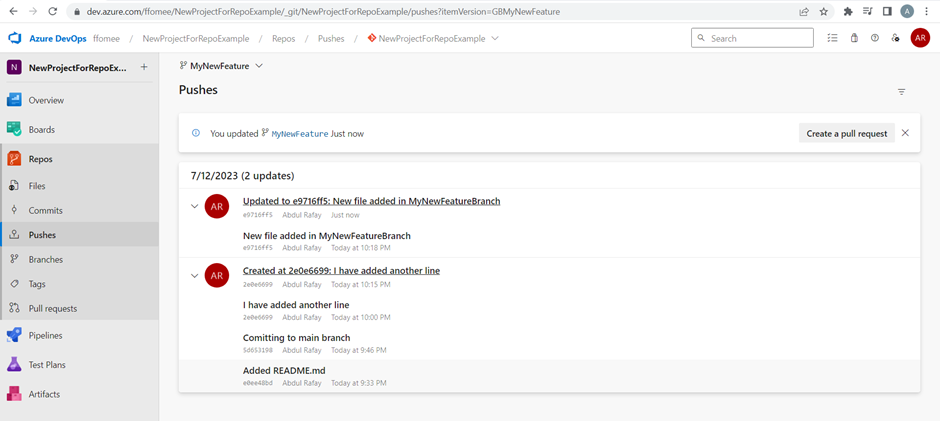
Step 1: Push the committed changes from your local repository to the remote repository. This can be done through the Git extension in Visual Studio Code or by running Git commands in the terminal.
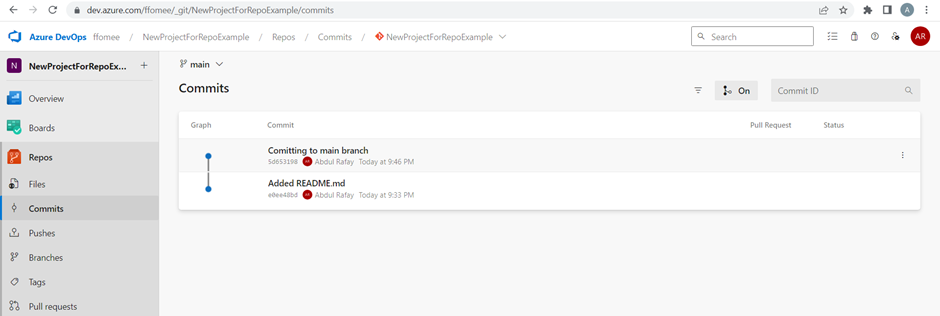
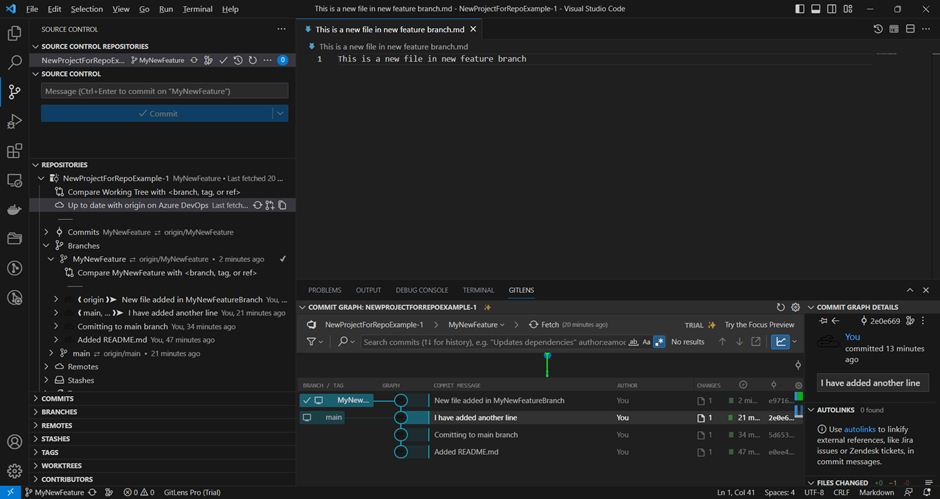
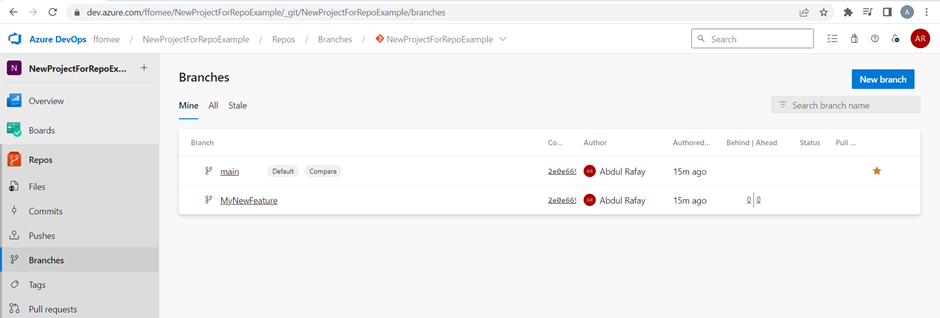
Step 2: Verify that the changes are successfully pushed to the remote repository by checking the repository in Azure DevOps Repos.
Working with Pull Requests, Handling and Approving a Pull Request:
Creating a Pull Request:
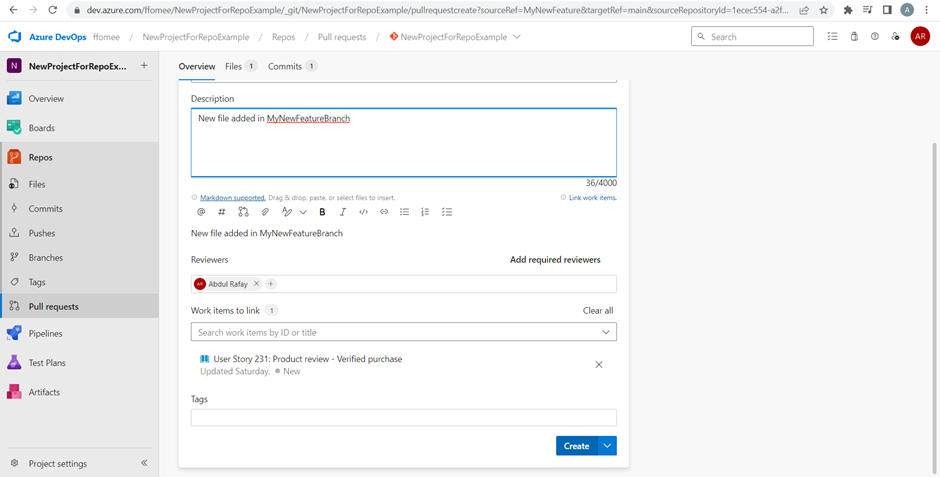
- Create a pull request to merge your feature branch into the main branch.
- Provide a title, description, and reviewers for the pull request.
- Review the changes, address feedback, and resolve conflicts if any.
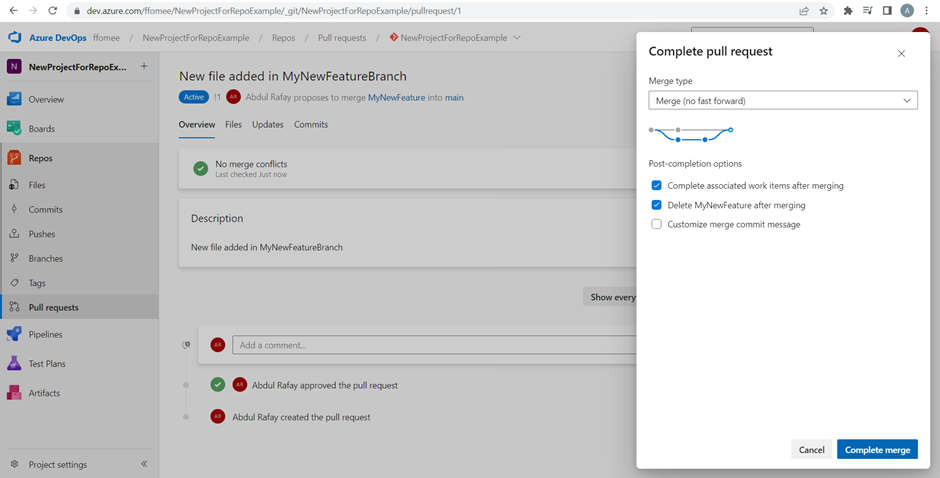
Approving a Pull Request:
- Reviewers examine the code changes, leave comments, and provide feedback.
- Once the changes are reviewed and approved, the pull request can be merged into the main branch.
Conclusion:
In this blog post, we explored source control management with Azure DevOps and Repos. We covered the steps involved in handling source control using Azure DevOps and Visual Studio Code. By leveraging Azure DevOps, teams can effectively collaborate, manage versions, and ensure a smooth development process. In the next part of this series, we will dive into the powerful CI/CD capabilities of Azure Pipelines. Stay tuned for more insights and practical tips to maximize your productivity with Azure DevOps!


